If you have kids or grandkids and want to date their school-years, this set of datestamps based on school grades will be useful. They are in greyscale so you can colorize them as needed.
Nobody has too many ribbons and bows for their layouts or kits. This script will create a triple-layered bow. If you don't use your own straight ribbon, the script will create a delicate organza ribbon for you that you can even use separately.
As a sampler, I created 3 ribbons and bows in basic colors and created one bow with a combination of the other three bows (since all the layers are left unmerged, they are easy to tweak).
Placing photos in a perfect circle is a tedious task. Making sure the sizing and the spacing is correct, is an added headache. This script will use as many photos as you want, do all the math for you, resize, rotate and space them all on a single layout.
I created a sample template with 8 photo spots (the script allows way more if needed).
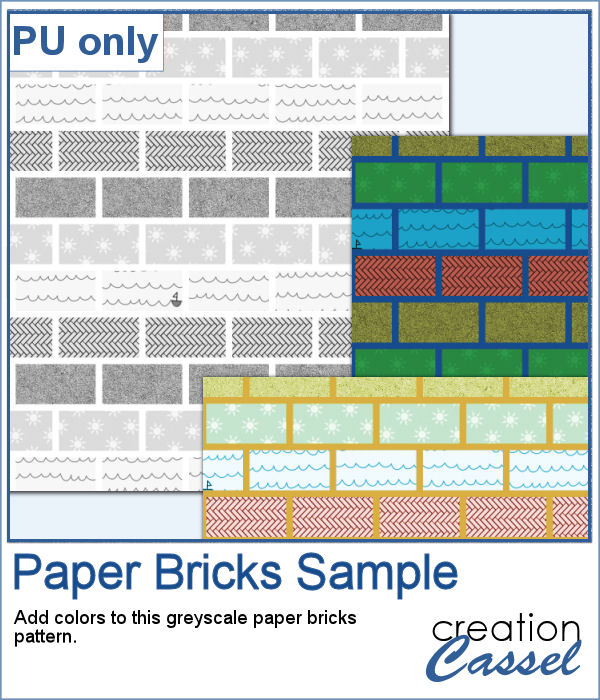
I created a script that will generate a brick pattern using any paper you want. A great way to create a matching paper for your own kit, or your projects.
As a free sampler, I created one brick pattern in greyscale that you can recolor as needed.
This last script will take any number of photos, and hang them on as many lines you want, taking care of all the resizing, rotating, and placing in the correct location. Everything with a touch of randomness so you will always get a slightly different result with each run.
As a sampler, I turned one end project into a layered template for 15 photos.
This week, the newest product is a stitching font, so it is NOT specific to PSP, as it can be used in any program that can use outside fonts. It is a two-layered font, so you can have different colors for different parts of the stitching.
This week, I created a set of 12 picture tubes to make some continuous netting in 12 different colors.
The sample is a full 3600x3600 pixels net made with the beige/neutral picture tube. It is in png format, so you can thread other elements through the mesh if you want.
This week, the script released will create a chevron pattern using any color palette you want.
As a sample, I created two full-size papers using the Blog Train color palette (so if you download it, it will match the July contributions).
This week, I created a script that will turn any shape into an ice cream treat.
I figured that since the July Blog Train was very "summery", I would use the color palette to create three treats for you as a sampler. They are in png format so they can be used in any program.
You can grab it on the blog.
This will happily complement your Blog Train supplies!
Instead of a script, this week, I released a series of vine picture tubes. By simply dragging your cursor, you can cover a whole wall with fall-colored vines. Of course, the set also includes individual picture tubes so you can create your own vines, in different shapes.
The free sample is a layered frame where you can add three photos. That frame is wrapped with vines.
Summer might be winding down, but we can always play with some pinwheels. The script will turn any paper into a paper pinwheel, with the correct orientation (which is not the case when using a template).
For a sample, I use papers from Janet Kemp's kit, Summer Fun, and created four paper pinwheels.
This month, it is a set of picture tube confetti for school themes (or others). There is one set of colored crayons as confetti that you can scatter over any project with kids, crafts, or school theme. The other is a set of tubes from lined papers confetti, just like those you would get if you spill all the punched holes from your puncher.
This week's new product is a set of gold chain picture tubes. I released the first set of gold chain picture tubes 12 years ago. It was about time to add more. Those are directional tubes, and will follow your cursor angles as you move it on your project. The set includes 10 different tubes.
I created four frames out of those gold chains: three singles and one double. Each frame is about 2000x2000 pixels and in PNG format so it can be used with any graphic program.
I have coded a script that will create slats/sections on a photo based on YOUR selection of "focussed areas" (so it won't cut off Aunt Lucy's face).
As a sampler, I create a template with evenly spaced sections for you to replace either by a single image, or multiple ones.
You can get it HERE
If you have kids or grandkids and want to date their school-years, this set of datestamps based on school grades will be useful. They are in greyscale so you can colorize them as needed.
Grab them HERE
Easter is almost there, so you can create your own decorated eggs (no mess) with any color palette you want with this script.
As a sampler, I created a dozen eggs that you can use for your Easter decorations, layouts, tags, etc.
Grab them on the blog
Nobody has too many ribbons and bows for their layouts or kits. This script will create a triple-layered bow. If you don't use your own straight ribbon, the script will create a delicate organza ribbon for you that you can even use separately.
As a sampler, I created 3 ribbons and bows in basic colors and created one bow with a combination of the other three bows (since all the layers are left unmerged, they are easy to tweak).
Grab them HERE
Placing photos in a perfect circle is a tedious task. Making sure the sizing and the spacing is correct, is an added headache. This script will use as many photos as you want, do all the math for you, resize, rotate and space them all on a single layout.
I created a sample template with 8 photo spots (the script allows way more if needed).
Grab it on the blog
I created a script that will generate a brick pattern using any paper you want. A great way to create a matching paper for your own kit, or your projects.
As a free sampler, I created one brick pattern in greyscale that you can recolor as needed.
You can download it on the blog.
This last script will take any number of photos, and hang them on as many lines you want, taking care of all the resizing, rotating, and placing in the correct location. Everything with a touch of randomness so you will always get a slightly different result with each run.
As a sampler, I turned one end project into a layered template for 15 photos.
Get this template on the blog.
Thank you, Carole, for all your many gifts!
Lisel, show off what you do with those freebies!
This week, I added some picture tubes in the store. With the dragging of your cursor, you can add climbing vines on any background.
As a freebie, I created a wooden lattice frame, and left a few vines climbing on it.
You can get it in the blog.
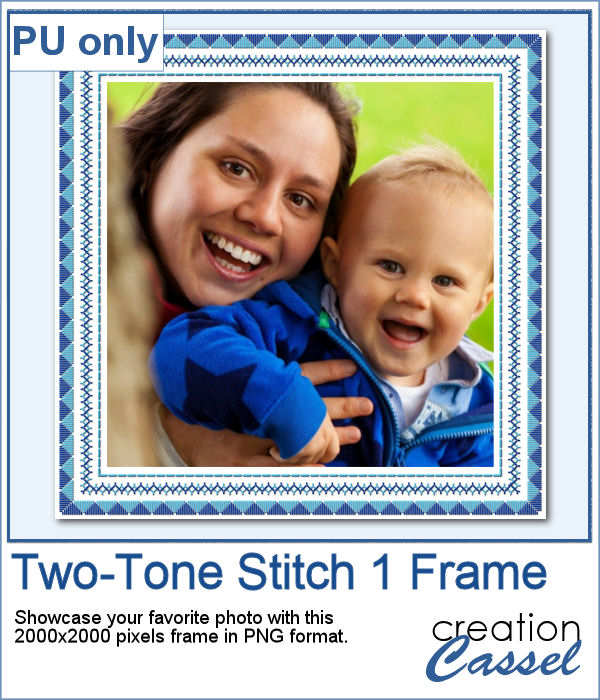
This week, the newest product is a stitching font, so it is NOT specific to PSP, as it can be used in any program that can use outside fonts. It is a two-layered font, so you can have different colors for different parts of the stitching.
For a sample, I created an embroidered frame.
You can grab it on the blog.
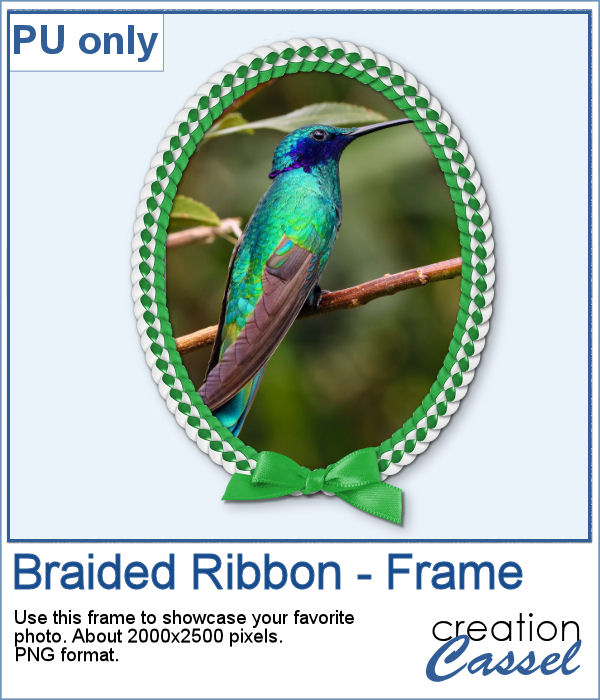
The latest product in the store is a set of picture tubes that will create a "braided ribbon" any length you want, in any shape you want.
As a sampler, I created this simple oval frame using one of the tube and an additional ribbon bow.
You can download it on the blog
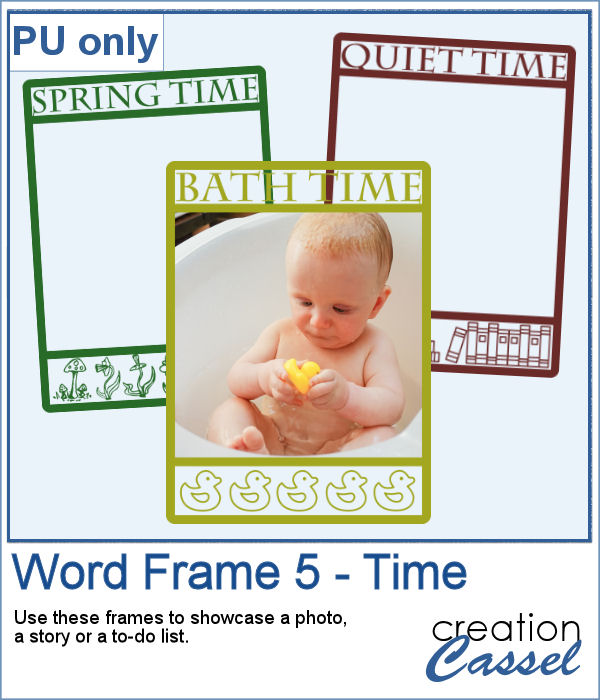
The script will create a frame with various texts of your choice in the location of your choice. The possibilities are endless.
As a sampler, I created a set of three frames in PNG format that you can use to showcase your favorite photos.
You can get them on the blog
Because the last freebie was quite popular, I created more, all around a vacation theme.
They are available HERE.
The latest script will imprint any shape or text inside a surface. You can choose different depth for your shape.
The samples are made of comic book onomatopoeia that can be added to any project. Using a blend mode will give the best result.
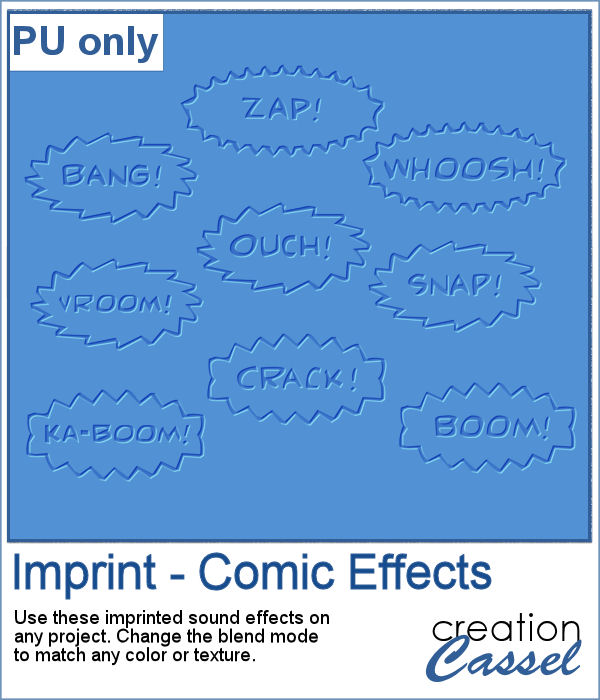
Grab them on the blog
This week's script will generate round beads using a variety of colors to create gradients.
I used the color palette from the June Blog Train to create a series of 15 beads, so you can use them along any other kits from the blog train.

You can get them on the blog.
This week, I created a set of 12 picture tubes to make some continuous netting in 12 different colors.
The sample is a full 3600x3600 pixels net made with the beige/neutral picture tube. It is in png format, so you can thread other elements through the mesh if you want.
And you can get this sample on the blog
This week, the script released will create a chevron pattern using any color palette you want.
As a sample, I created two full-size papers using the Blog Train color palette (so if you download it, it will match the July contributions).
You can grab it on the blog.
For July, the featured freebie is a layered mask made using a paint splash script.
And you can grab it all month long on this page.
This week, I created a script that will turn any shape into an ice cream treat.
I figured that since the July Blog Train was very "summery", I would use the color palette to create three treats for you as a sampler. They are in png format so they can be used in any program.
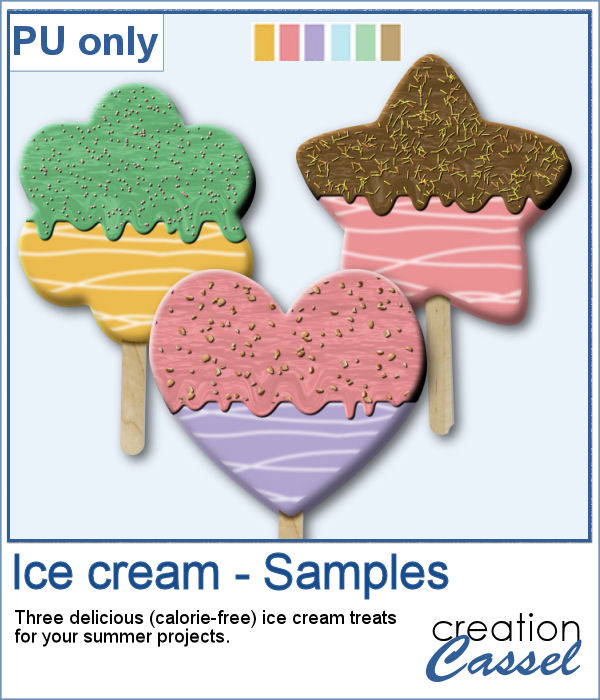
You can grab it on the blog.
This will happily complement your Blog Train supplies!
I created a script that will take any text of your choice and make it echo upward or downward.
I also have a freebie of individual digits in greyscale, so you can colorize them as needed.
You can get this freebie on the blog.
The next script in the store lets the user create a travel tag with their choice of colors and text.
A sampler includes 3 tags that are blank, in PNG format.
These are available on the blog.
The newest product in the store is a set of variegated netting picture tubes.
A sample was made using a wooden frame and some blue netting to create a nautical frame in png format.
This frame is available on the blog.
This script will create some fabric patches from any vector shape.
I created a few samples for you to play with.
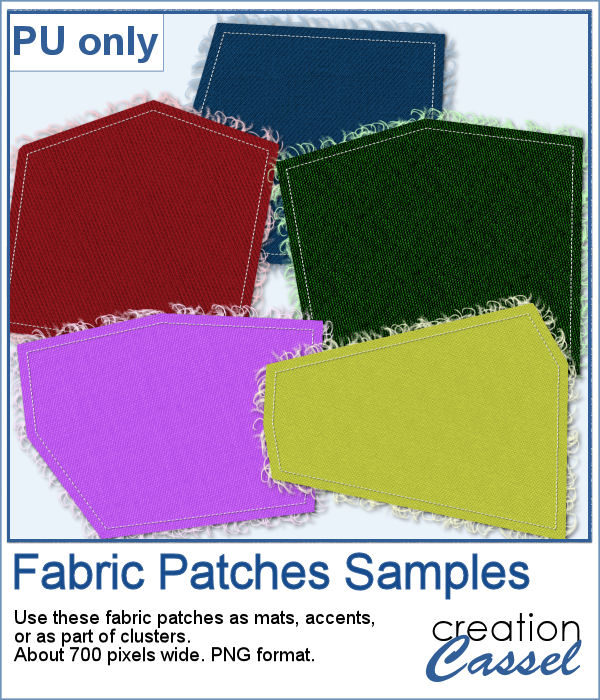
They are available on the blog
The script will create a variety of tickets, one at a time or a series of them with many options for you to add.
Here are four samples, showcasing some seasons.
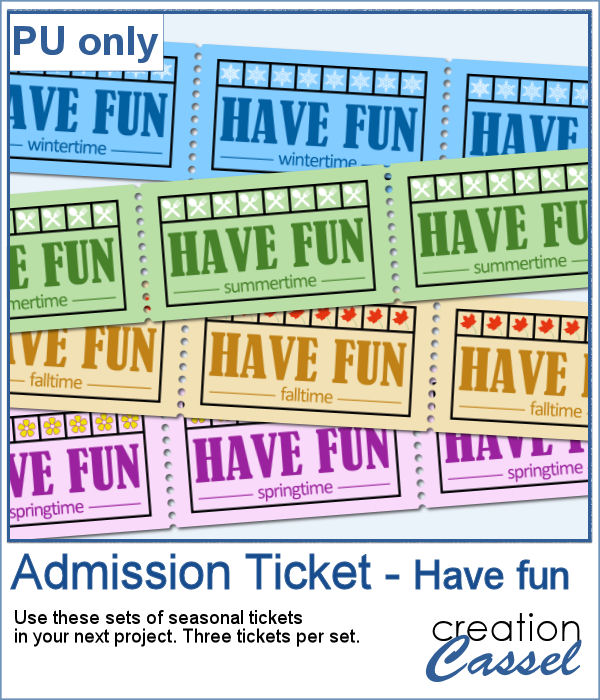
You can get them on the blog.
Instead of a script, this week, I released a series of vine picture tubes. By simply dragging your cursor, you can cover a whole wall with fall-colored vines. Of course, the set also includes individual picture tubes so you can create your own vines, in different shapes.
The free sample is a layered frame where you can add three photos. That frame is wrapped with vines.
You can get this frame on the blog.
Summer might be winding down, but we can always play with some pinwheels. The script will turn any paper into a paper pinwheel, with the correct orientation (which is not the case when using a template).
For a sample, I use papers from Janet Kemp's kit, Summer Fun, and created four paper pinwheels.
You can get them on the blog.
For your school day projects, here is an alphabet made of lined paper with perforated edges.
You can get this featured freebie on the blog.
A new month means a new featured freebie.
This month, it is a set of picture tube confetti for school themes (or others). There is one set of colored crayons as confetti that you can scatter over any project with kids, crafts, or school theme. The other is a set of tubes from lined papers confetti, just like those you would get if you spill all the punched holes from your puncher.
You can get this featured freebie on the blog.
This week's new product is a set of gold chain picture tubes. I released the first set of gold chain picture tubes 12 years ago. It was about time to add more. Those are directional tubes, and will follow your cursor angles as you move it on your project. The set includes 10 different tubes.
I created four frames out of those gold chains: three singles and one double. Each frame is about 2000x2000 pixels and in PNG format so it can be used with any graphic program.
You can get those frames on the blog.
Pages