Uploading Kits & Bundles
On your profile, under your Tools menu select "Upload Kit" or "Create Bundle".
Bundles
You can either create the bundle first and list it on all the kit pages, or you can create the bundle last and list all the included kits on the bundle page. Whichever works best for you is the best option!
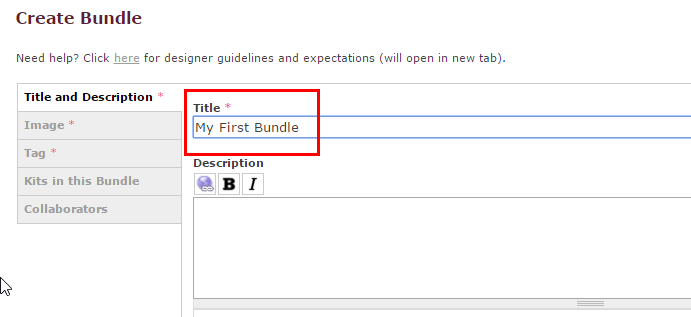
First, add the title of the bundle. Bundle names should always include the word "Bundle" at the end. You may also enter a description if you wish. The description can help people find your bundle, so a good description can help you out.
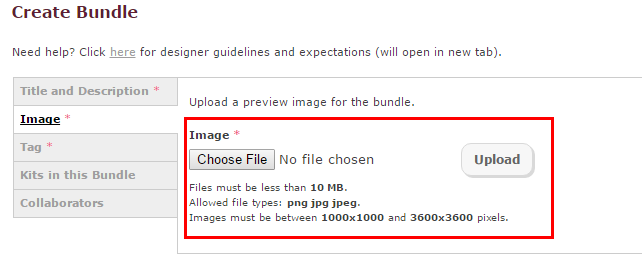
In the next section upload a preview image for your bundle. Keep in mind that the site will automatically add the DigitalScrapbook.com Commons logo to the bottom left corner. You may download a sample preview image here which you can use if you'd like.
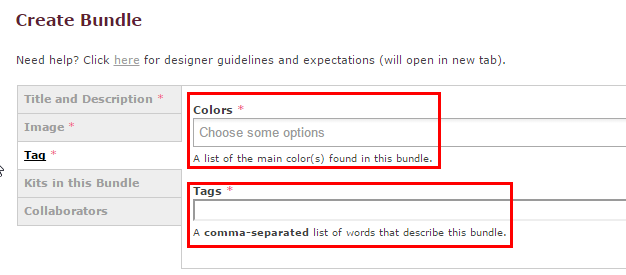
In the next section enter the main colors of the bundle and the most descriptive tags for the bundle. Please see here for help with tagging.
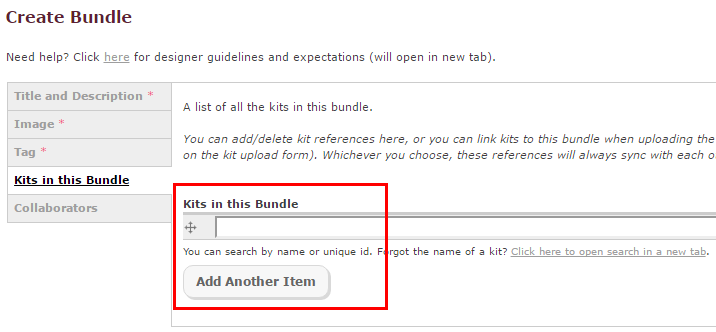
In this section you may list the kits included in the bundle. If you have not created the kits yet, that's fine, you can instead list the bundle on the kits' pages when you create them.
Kits
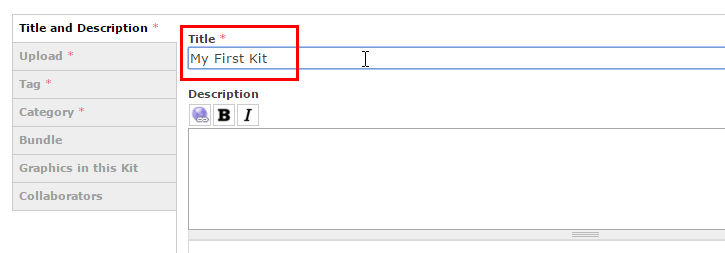
First, add the title of the kit. Kit names should always include the word "Kit" at the end. You may also enter a description if you wish. The description can help people find your kit, so a good description can help you out.
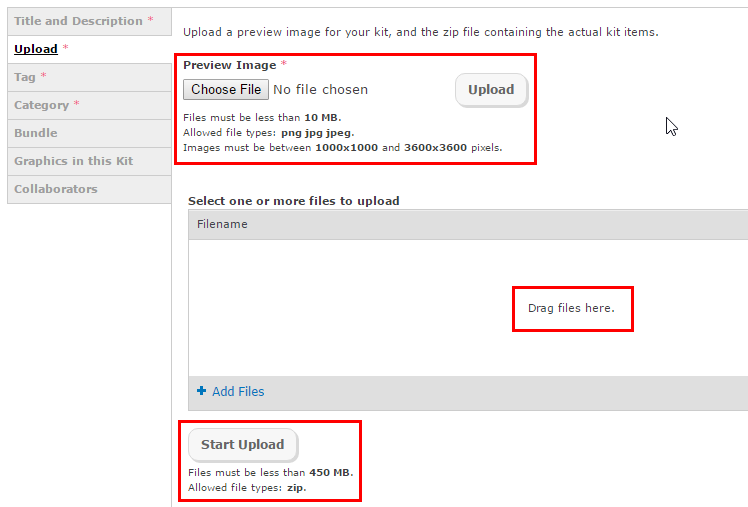
In the next section upload a preview image for your kit. Keep in mind that the site will automatically add the DigitalScrapbook.com Commons logo to the bottom left corner. You may download a sample preview image here which you can use if you'd like.
Next, drag and drop the zipped file of your kit. Zipped kit files MUST:
- Include the kit preview image (option to include bundle image as well).
- This TERMS_OF_USE.TXT file
- All the individual graphics for a kit. It is helpful to rename the files as following: ps-designer_name-graphic_title
- Be sure all graphics are in a folder BEFORE zipping.
Do not include in the zipped file
- Any other TOU info
- Any images that are not graphics for the kit (including coupons, links to other stores, etc)
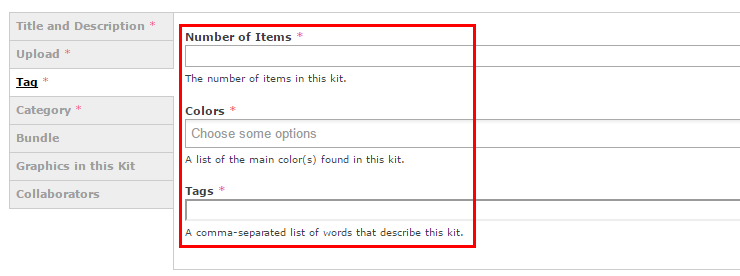
In the next section enter the number of graphics in the kit, the main colors of the kit and the most descriptive tags for the kit. Please see here for help with tagging.
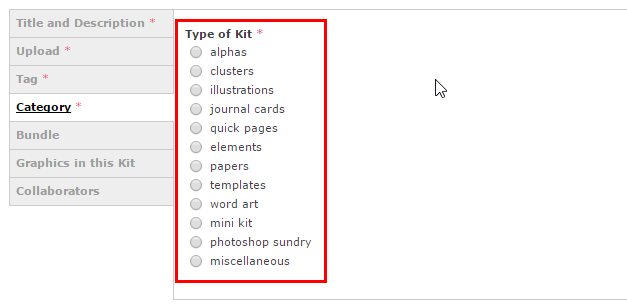
In the next section choose the category that best represents the kit. Some categories have subcategories so take a look through the list to familiarize yourself with all the options.
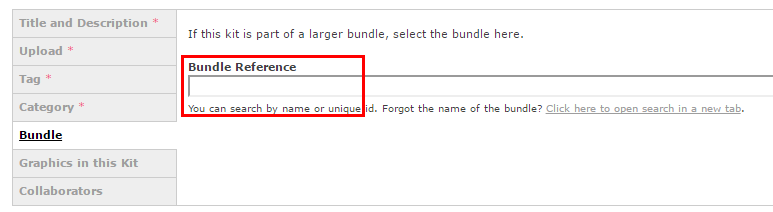
You may enter the name of the bundle here. You can also list the name of the kit on the bundle page once the kit has been created.
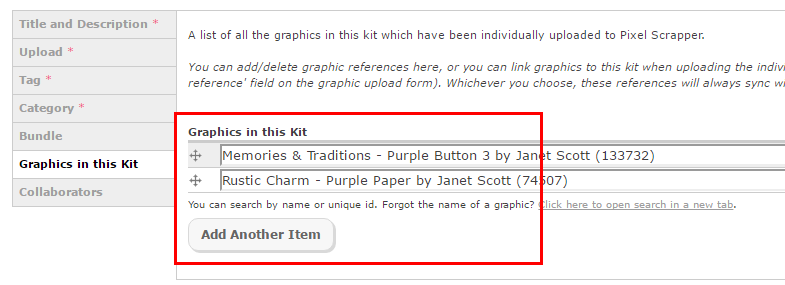
If you are adding the kit after the graphics, you may list all the graphics you want included in the kit here.
Naming Files in a Zipped Kit Folder
Before zipping your kit folder, it is helpful to rename the individual files in the kit so that people know where they came from after they unzip the kit. A good graphic title looks like this: ps_designer-name_kit-name_graphic-title
You can easily rename and add prefixes to files using a Bulk Rename Utility (this program is PC only, but there are similar programs for MacOS).