
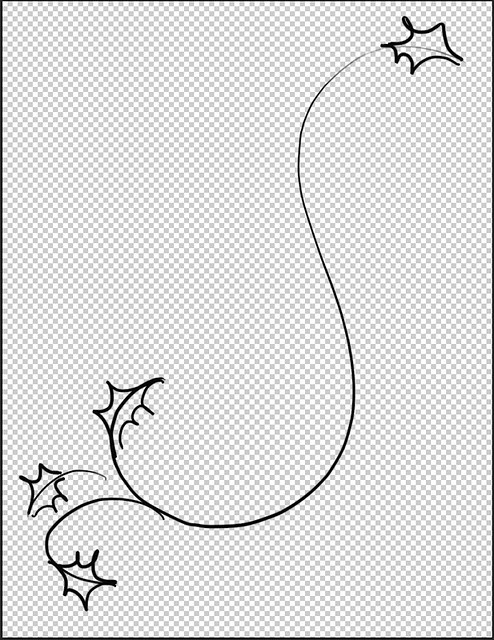
This works best on thin lines.
Start with a black line, or swirls, or as shown here, I’m starting with the holly doodles I made.
Now you can either clip a glitter sheet to this “shape” - learn how here
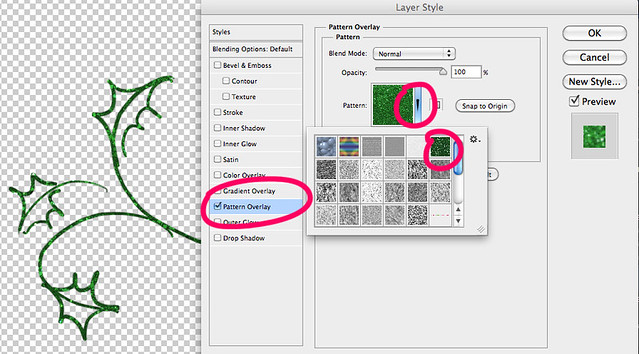
or I’m going to use a layer style (I’m going to use a .pat file) - learn how here
If you don’t already have glitters in your stash you can grab these great glitters by Marisa Lerin here.
I chose to use a layer pattern (.pat file) and I chose a green glitter (one I already had made for these fun holly doodles).
You can get to the layer styles at the top menu bar: Layer > Layer Style > Pattern Overlay

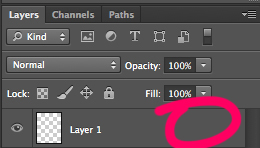
or, I like to double-click to the right of the layer in the layer panel and it brings up the same layer style window.
If you do it my way, then you will have to click on the words “Pattern Overlay.” This will “check” the pattern overlay style and bring up this styles options.
Note: If you only click on the box to “check” the style, the options box won’t come up. No problem...just click on the words “Pattern Overlay” to bring you to the options.
Click on the drop-down arrow by the pattern box to see your available patterns. Pick a glitter.
While we are in this layer style box, we are also going to "check" the "Bevel & Emboss" style. You do NOT need to check contour or texture, and you can leave all the settings to their default.

We are also going to “check” the “Drop Shadow” style. See the image below showing the adjustments I made to the options for this style.

Click "OK"
But what about having multiple colors, or in this case the red berries for the holly?
A separate layer contains the dot doodles for the berries. You apply the same 3 layer styles above, but the glitter should be a red.
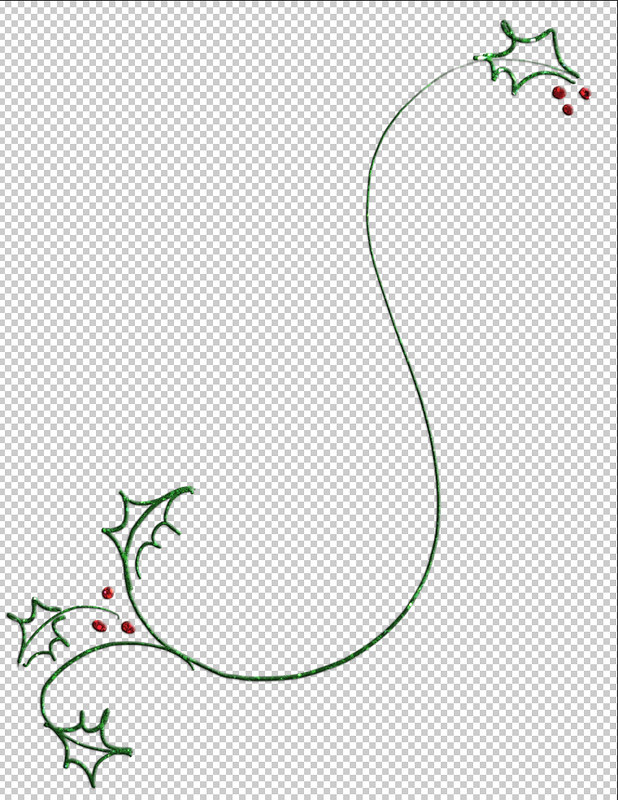
Now it looks like you squeezed glitter paint right from a puffy paint bottle.
I can’t wait to see all of your glitter puffy paint creations!
And if you want to grab this cute holly, you can here 
and I made two more - get holly 002 and holly 003
Love it!
awesome! One of those, why didn't I think of that moments . Can't wait to try it!!
Such a great strategy! Thank you for taking the time to prepare and share this!
Thanks a lot!
Cute! Great tutorial
Thanks for sharing your tutorial.
Thanks! Would love to try it out:)
Thanks for the tutorial!!!
omgosh so easy, thanks for sharing awesome tutorial!
Awesome, so easy! C:
so pretty! Reminds me of the outfits my mom made for me in elementary school... I didn't have many friends lol
Good tip. Thanks.
Thank you.
Awesome! Thanks!
Very cool! This will look great on Christmas cards! Thanks so much for this!
wow, I really have to try this!
Your tutorials are the best - easy to follow and very useful. Thanks much!
Thank you so much for this!
AWESOME - I am so going to use this! Thanks!
Thank you!!
Can you do this same thing in the GIMP programs?
So that's how you do it! Thanks! Great tutorial.
Awesome. Thank you!
Thank you thank you thank you! Will try it immediately!
Neat. That's very useful.
Awesome! Thanks.
Fantastic tutorial Brooke! Love the holly too!
Thank you!
So easy - thank you!
This is awesome hun thank you for sharing with us all.
Thanks for this tutorial!
Pages